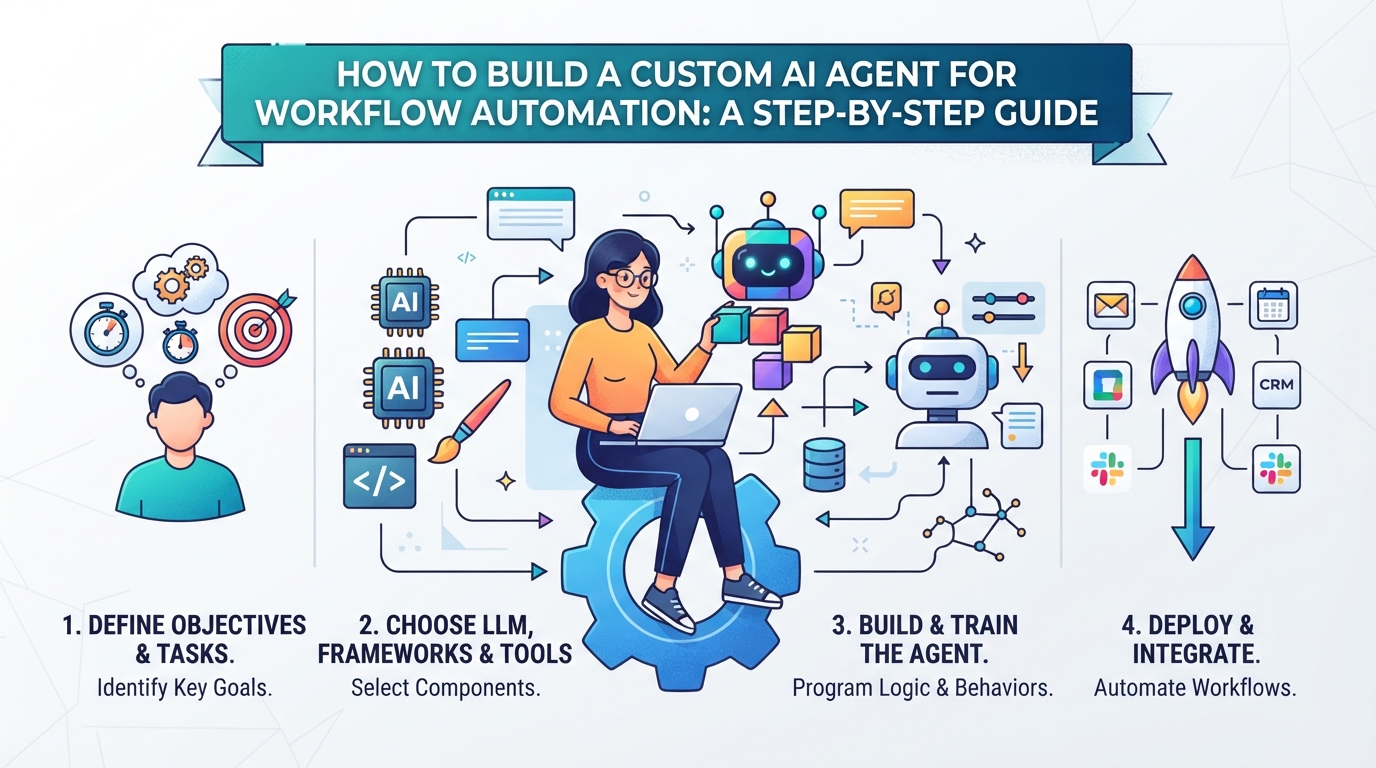
How to Build a Custom AI Agent for Workflow Automation: A Step-by-Step Guide
Introduction to Custom AI Agents for Workflow Automation
Traditional workflow automation is great at handling predictable, repetitive tasks—think “if this, then that.” But what happens when your data is messy, or a customer’s request requires actual critical thinking? That is where traditional tools break down.
Enter custom AI agents. Unlike rigid, rule-based software, these intelligent systems use large language models (LLMs) to reason, adapt, and make real-time decisions.
Here is how they stack up against classic automation:
- Traditional Automation: Follows strict, pre-defined rules and breaks when variables change.
- Custom AI Agents: Understands context, learns from data, and solves complex, unpredictable problems.
Learning how to build a custom AI agent allows you to delegate entire cognitive processes—like triaging support tickets or analyzing market trends—to an autonomous digital teammate. It’s no longer just about saving time; it’s about scaling intelligence.
The Evolution: Moving from Static RPA to Dynamic AI Agents
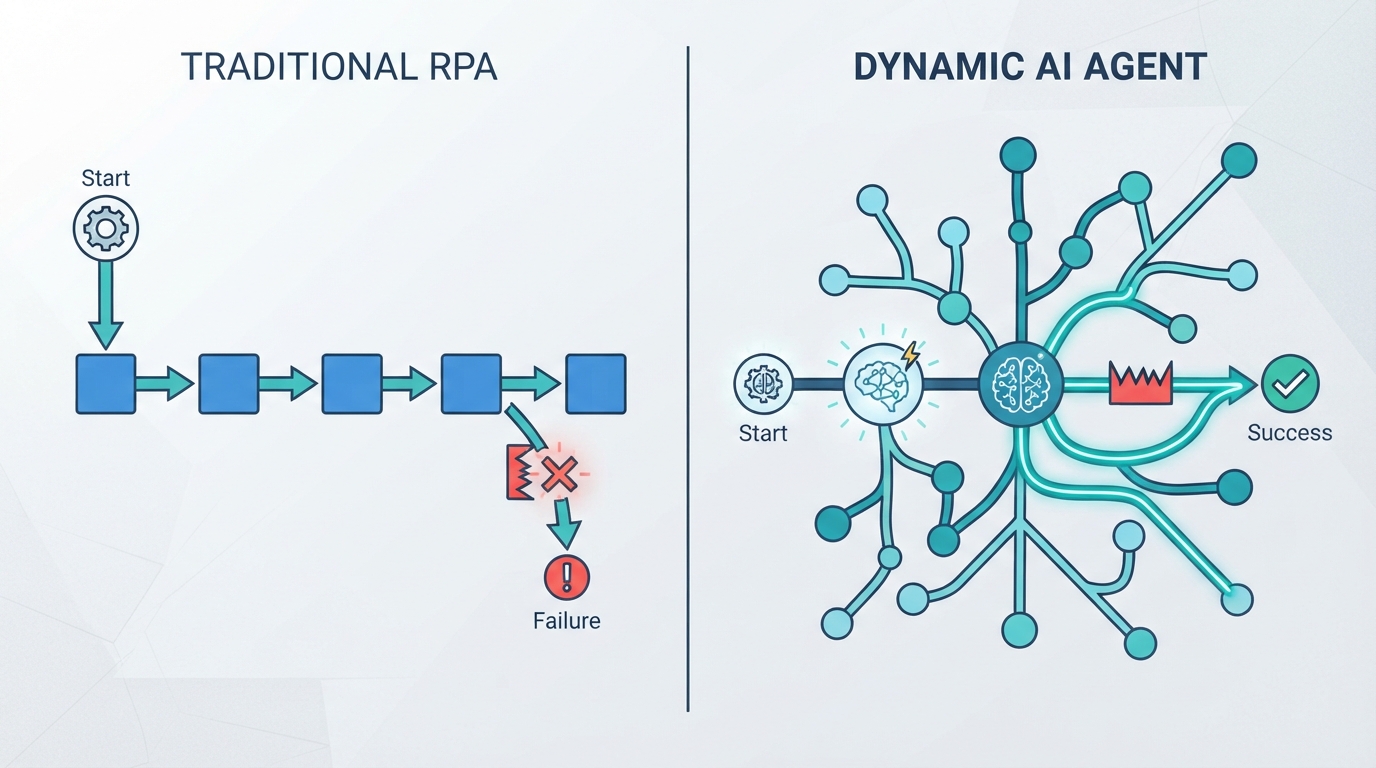
To understand this shift, we have to look at how workflow automation has evolved. For years, Robotic Process Automation (RPA) was the gold standard. It excelled at repetitive, click-heavy tasks—like copying data from a spreadsheet into a CRM.
But RPA has a major blind spot: it is completely blind to nuance. If a user interface changes by a single pixel, or an invoice arrives as an unstructured PDF instead of a clean CSV, the system crashes.
This is why the landscape of workflow automation is shifting. When comparing RPA vs AI agents, the difference lies in adaptability.
Here is how they handle real-world complexity:
- Unstructured Data: RPA needs structured inputs. AI agents can read a messy email, extract the sentiment, and draft an appropriate response.
- Decision Making: RPA follows rigid if/then paths. AI agents use LLMs to reason through unexpected roadblocks.
- Maintenance: RPA requires constant updates when software UI changes. AI agents adapt dynamically to new environments.
Ultimately, RPA mimics human keystrokes, while AI agents mimic human decision-making.
Step 1: Define the Agent’s Core Objective and Guardrails
Before you write a single line of code, you must define your agent’s boundaries. If you want to know how to build a custom AI agent that actually drives ROI, you must start with a laser-focused blueprint.
Without strict safety guardrails, a highly capable LLM can easily hallucinate facts, access restricted data, or take rogue actions.
To prevent this, establish three critical boundaries on day one:
- The Objective: Define one specific, measurable goal (e.g., “Extract invoice data and flag discrepancies”). Avoid vague, open-ended missions.
- The Scope: Limit the tools and databases the agent can access. For example, grant read-only permissions for CRM data to prevent accidental deletions.
- The Guardrails: Set hard rules to block bad behavior. Mandate a “human-in-the-loop” approval step before any external emails are sent or financial transactions are finalized.
By narrowing the sandbox, you ensure your agent remains a reliable asset rather than a liability.
Step 2: Choose a Base LLM and Program System Instructions
With your boundaries set, it’s time to select the brain of your agent—the base LLM—and program its core logic.
Choosing your model is a balance of speed, cost, and intelligence:
- Frontier Models (e.g., GPT-4o, Claude 3.5 Sonnet): Best for complex, multi-step reasoning and tool use.
- Lightweight Models (e.g., Llama 3, GPT-4o-mini): Perfect for high-volume, simple tasks like data extraction.
Once selected, you must write precise LLM system instructions to define its persona and operational boundaries. Think of this as the agent’s permanent operating manual.
For maximum reliability, structure your instructions with these three components:
1. Role & Persona: Define who the agent is (e.g., “You are a meticulous billing auditor”).
2. Workflow Steps: Outline the exact sequential logic to follow.
3. Output Format: Specify the required format, like JSON, to ensure seamless integration with downstream tools.
Step 3: Connect APIs to Enable External Actions
With your agent’s brain configured, it’s time to give it hands. To transform a passive text generator into an active assistant, you must connect APIs that link your LLM to the external tools your business relies on daily.
By leveraging AI agent APIs, your model transitions from simply answering questions to executing real-world tasks. This integration typically happens in three steps:
- Define the Tools: Write a JSON schema describing the API’s function, parameters, and endpoints to the LLM.
- Enable Function Calling: Let the LLM decide when to use a tool based on user intent.
- Execute and Return: Your application runs the API call, grabs live data, and feeds it back to the LLM.
This loop allows your agent to seamlessly query CRM databases, update inventory sheets, or trigger Slack alerts in real time.
Step 4: Implement Persistent Memory to Maintain Context
Now that your agent can take action, it needs a brain that remembers. Without robust AI agent memory, your bot treats every message like a first date, forgetting what happened just seconds ago.
To build a truly intelligent workflow, you must maintain state using a dual-memory system:
- Short-Term Memory (The Conversation Thread): This tracks the immediate interaction. Use a sliding window buffer to pass the last few exchanges back to the LLM, keeping the current task on track without exceeding token limits.
- Long-Term Memory (The Vector Database): This stores user preferences and historical data across sessions. By saving past interactions in a vector database like Pinecone or Chroma, your agent can recall critical details weeks later.
By pairing these systems, your agent gains a persistent identity, transforming disjointed prompts into a continuous, intelligent workflow.
Step 5: Rigorously Test, Iterate, and Deploy
Now that your agent has a brain, it’s time to put it through its paces. Knowing how to build a custom AI agent is only half the battle; the real magic happens when you relentlessly test and iterate before launching it into the wild.
To ensure a flawless deployment, follow this three-step hardening roadmap:
1. Audit Responses for Hallucinations: Run a battery of diverse test queries to check for factual accuracy and tone consistency. Set up automated evaluation scripts to catch edge cases.
2. Troubleshoot API Timeouts: LLM APIs will lag or fail. Implement exponential backoff retry logic and fallback models to keep your workflows running smoothly.
3. Refine and Iterate Prompts: Tweak your system prompts based on failure points. Lock down your prompt versioning so unexpected model updates don’t break your agent.
Once your agent passes these stress tests with flying colors, push it to production and let automation do the heavy lifting.
High-Impact Enterprise Use Cases for Custom Agents
Now that your agent is hardened and live, where does it actually drive the most value? In the enterprise, custom agents excel at taking over complex, high-friction processes that span multiple legacy tools.
Here are three high-impact ways organizations deploy these digital teammates to drive efficiency:
- Multi-System Workflow Orchestration: Instead of employees manually copying data between CRM, ERP, and messaging apps, agents manage these multi-system workflows autonomously. They instantly sync data and trigger actions across your entire tech stack based on real-time operational events.
- RAG-Powered Knowledge Retrieval: By connecting agents to internal databases, RAG enterprise automation allows teams to query complex wikis, PDFs, and legacy repositories. Your staff gets cited, accurate answers in seconds without manual digging.
- Continuous Compliance Auditing: Agents can continuously scan financial transactions, system logs, or legal contracts against regulatory frameworks. They automatically flag compliance anomalies and generate audit trails, saving hundreds of manual review hours.
Conclusion: Preparing for the Next Phase of Automation
Learning how to build a custom AI agent doesn’t mean you have to overhaul your entire business overnight. The most successful deployments follow a simple, repeatable blueprint:
1. Define the scope: Pinpoint a single, repetitive process.
2. Connect your stack: Securely link your LLM to internal data sources and APIs.
3. Establish guardrails: Set strict prompt guidelines and human-in-the-loop review steps.
4. Iterate: Refine agent prompts based on real-world performance.
To guarantee success, start small. Choose one high-friction bottleneck—like customer ticket triage or manual data entry—and set clear KPIs to measure your progress:
- Time-to-Resolution: Track how quickly the agent completes the task compared to manual execution.
- Accuracy Rates: Monitor the percentage of tasks completed without needing human correction.
- Hours Reclaimed: Calculate the weekly manual labor redirected to higher-value strategy.
By focusing on these targeted metrics, you will prove the ROI of workflow automation early and build the momentum needed for wider organizational adoption.